Pages

Showing posts with label Gina's Designs. Show all posts

Sunday, May 25, 2014

A little China...... Cabinet

 Good Day my friends!!
Today's project from Gina's Designs is a new little china cabinet and it is A-dorable!  It is made with a hard board and so it was easy for me to use my American Chalk paint on it.  I have been wanting to do a project with it and this worked perfect- the small version of my ideal little cabinet.  The doors open and there are 2 shelves in there to store little items on it.    
On the bottom are 3 little drawers that are sturdy and open and can actually be used for storage (imagine that!).  I got these little drawer pulls that are actually brads- aren't they perfect for the distressed cabinet?  I adore it. 

Products Used: 

Sunday, May 18, 2014

You know, the REAL paper cards!

Project number one is a card.  My son is a pilot so as soon as I saw this cute litte (masculine) airplane I knew I had to make a card to mail out to him.  So back up a few weeks and he and I were talking about making a card that was black, had clear embossing and then one white object on it.  So this is my take on our discussion for him. 
  I thought I needed to start working on graduation cards since this will be a big year for graduates with our friends and family.   So this is the first one I made- kept it simple but fun I think.  The frame is just cut out of red cardstock.  The cap is chipboard that I painted black and then covered with glaze to give it a little sheen: little red stickles on the tassle. 

This graduation set is so perfect this time of year to be making graduation invites and cards- check them out! 

Products

Sunday, May 4, 2014

Moments Like This

Hello  everyone!  Today's project is a little Project Life double page.  Some of you may have seen that Gina's Designs has come out with some great chipboard embellishments, project life cards as well as organization tools!  

The page on the left lower card is a MOMENT card.  In this page I used another sentiment card behind it but it could easily be used in front of a picture that was highlighting a specific moment.  I am trying to get some of my graduation pages ready for pictures to be added for my son.   

This is another of the little project life die cut cards- again I took one of my graduation cards with the diploma on it and used the chipboard card to highlight it.  I just love that little scroll there in the top corner!  

GDT product:

Sunday, April 27, 2014

Heart Wall Art


A key to the journey of our lives.  When I got this from Gina I was a little perplexed on what I would do with it.  I wanted to make something that I would be able to use in my home, a little addition of "steampunk" and vintage together. 

I started with the chipboard key and painted the entire key with grey paint.  I then took the steampunked/gear heart (the top piece) and painted it yellow.  Once all the pieces were dry I then took individual gears and painted them gold and attached them randomly over the heart.  I then used the wings and a couple of gears to accentuate the middle point  


The vintage lace was threaded with a gold ribbon and the word journey along with the key were added. 

Now it is something I can hang in the house with a little extra flair!  

GDT products: 

Sunday, April 20, 2014

Happy EASTER!


So this week I thought I would make a little spring project that will also fit for this weekend's EASTER celebration.   I had these candy tubes and of course some jelly beans and they fit so well with the dangling spring sentiments and embellishments in the spring shape set over at Gina's Designs.  


I painted all the pieces first with adirondak paints and then used a speckled stamp for the umbrella and an eraser for the boot!  Aren't they cute?  I just attached them to the ribbon and they hang down like charms.  :) 

Gina's Designs Product:

Sunday, April 13, 2014

Seaside Escape

Hello!!  So today's project is a little different don't you think?  The base of the project is the Gina's Designs Spool  At first i was not sure what to do with it and then i went through all the chipboard scenes I had  and the beach is where I wish I was now- so here it is. 
The spool was coated with modge podge and then I covered it with coarse sand.  Then I took all the little pieces and started painting them.  Lets see what there is here, first is the little adirondeck chair surrounded by shells and flowers.  Look at the little lobster!   In the background is the white weathered fence with the life saver hanging on it surrounded by some tall grass.  Atop the entire spool is a lighthouse ... beckoning you to come and join us on the beach!
Come join us for some sunshine and sand!

Gina's Designs Product


Sunday, April 6, 2014

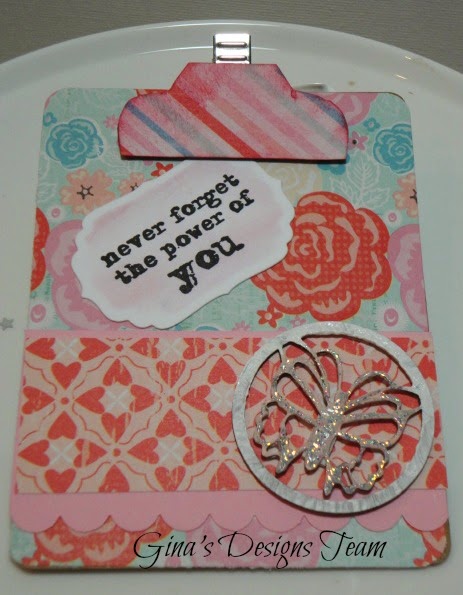
Clip a Quote


So today I am showing off a cute little project from Gina's Designs.  It is kind of fun because it is quite different from most things  It is about 3-4 inches in size and a nice little gift for someone in your office with a special inspiration. The little kit comes with the board, the little tag top and the clip- easy peasy to put together and decorate!  

Gina's Designs Product: 


Sunday, March 30, 2014

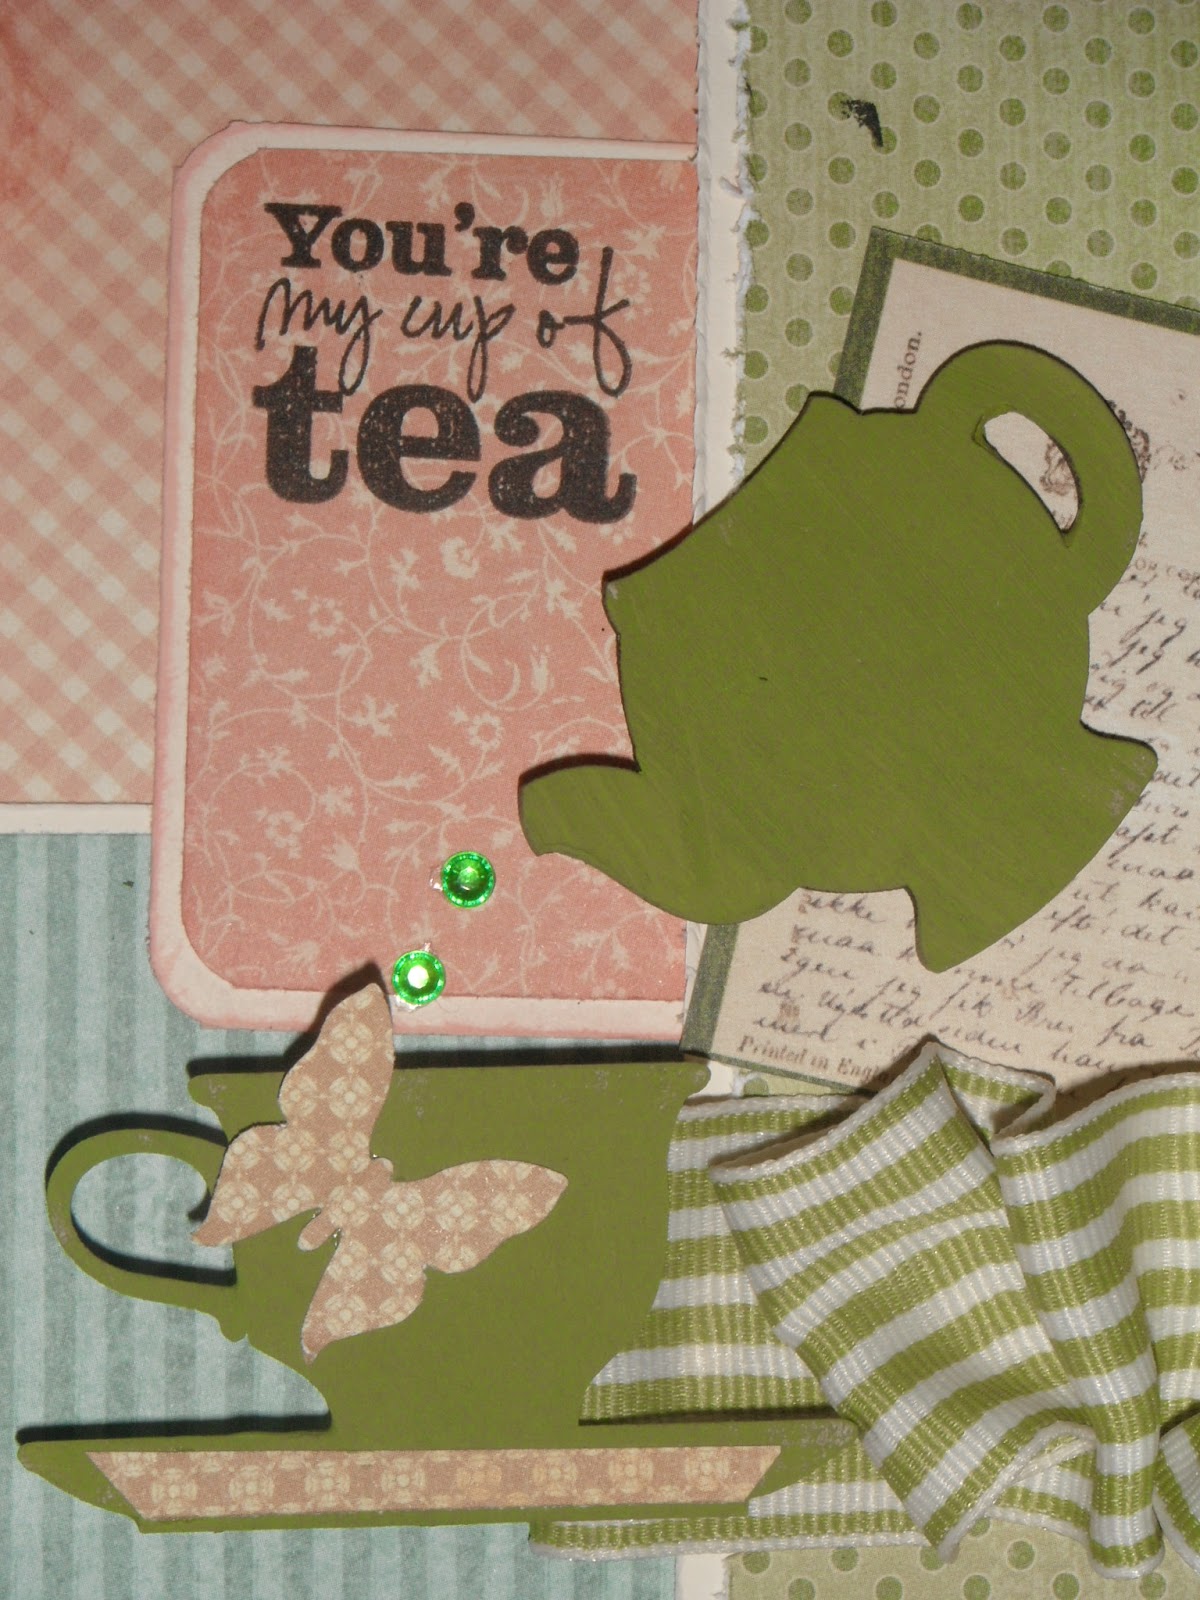
A Little Tea.....

 Just a little piece of art for the home that I made this last weekend.  I had these wonderful little tea cups from Gina's Designs and I really was struggling to figure out what to do with them.  Then I found this cute little sentiment and I knew exactly what I would make with them. 
Here is a little close up of the tea pot and the tea cup.... with a little sparkly liquid! 

Gina's Designs: 

Wednesday, March 19, 2014

Take a Balloon Ride

 Hello all my dear friends!  Today I have another project for Gina's Designs.  I just adore these large size chipboard tags so much, giving you lots of space to decorate and make a statement.  
 I started this tag by taking a piece of kraft cardstock, crimping it and then tore a couple of spots in the top paper so that the "corrigated" paper shows through. I like doing this because then you can tear your paper and either stamp on that back piece or in this case- I put in a gear and then layered another layer of gears/buttons on top of it. 
Then at the top of the tag I added a few more gears and tied them together: my thought in my head is that the gears are turning and the baloon is rising.  

Products used: 

Sunday, March 16, 2014

Vintage Camera Box

Welcome! 
So today I have a sweet little vintage camera box. The first picture is it in sepia which I thought was quite fitting! 
Doesn't it look old, distressed and vintage?  

Now we can give you a different perspective of it in color so you can see the beautiful sparkle and the delicate flowers from Craft Supplies 1.
 I started the box by putting it all together- I use E6000. Then I really wanted it too be vintage and distressed so I spray painted it with white paint: and part of the look is due to the way this product "takes" the paint if you do not prep it.  So I preface with I did not prime it this time to get this look.  I then used some clear liquid glue all over it and covered it with glitter flakes- I mean what doesn't look romantic with glitter flakes.  
 So then i wanted the lens to look vintage and cracked so I used about 5 layers of UTEE, put it in the freezer for about 10 minutes and pulled it out and bent it a little to crack it.  Looks old- right?  Now in this photo you can get a great look of those beautiful flowers-  we will start with the sheer white ones with pearls in the middle- can you say delicate?  Then there are the clear beads with wire and in the back of this photo you can see little pearl flowers with rhinestone centers: these are so sweet and special. 
Here is another photo of the flowers and beads.... look at those sparkly blue beads!  And you can peak at those little pearl flowers with the rhinestones in the center.  So sweet!  

Products:

Sunday, March 9, 2014

A special Note

So this month as you are all aware is our cross promotional month with CraftSupply1 and so I was eager as the next gal to get these sweet little flowers and beads in my hands.  I had a special card to make for someone that is going out for surgery and we all wanted to let her know that we were thinking about her.   
  
This is the inside of the card. I wanted to have room for everyone to sign the card so I made a few little tags to go inside the pockets and then the middle piece is for signing.  All the people wanted to have their messages on the tags already so I might have to ad some more inserts- and then I will have to write a long message in the middle so it is not empty.
Here is a close up of the products used on the one pocket.  The swirl is from GD and the clear beads and flower are from CraftSupplies1.  I painted the chipboard swirl and then added a bit of stickles.  And here is a picture of the flowers on the front of the card (by CraftSupplies1) which are beautiful little bell flowers. 

 Products Used

Friday, February 28, 2014

Queen Ann's Canvas

 Hello everyone!  So today's project is a canvas I made for Gina's Designs and I used the Lace Flowers for this one.  To start the project I used the honeycomb grid to put some medium randomly on the canvas.  I then painted the entire canvas with a light gray paint: going back to add a little mustard to the medium spots (now these areas dried within an hour or two).  I painted the lace flowers with paint and then I used some medium to give it a little depth along with some glitter.  
Here is a little closer picture of the flowers.  I have them lifted off the page to give the entire canvas some depth.  The glitter is actually very fine and all over the entire canvas which looks so pretty although you can not get a good photo of this.  

Gina's Designs

Sunday, February 23, 2014

Valentine Box

 Hello!  I had to share one more Valentine Project that I did for Gina's Designs.  This is my valentine box- used to collect valentine's at work.  It is actually a tangerine crate that I covered with white paper and then pink heart embossed paper.  Then I used a variety of the Gina's Designs Valentine chippies.  

On the far left I have used a little pink heart and another white heart from the Cupid Shape Set. On the front of the box is a solid heart and then a white double heart(Valentine Shape Set).  All my chippies were painted with spray paint. 
Then there is the little cherub, painted white and he is shooting hearts that I painted in varigated pink and red paints.  In the background you can see the two pink/white straws holding up the all loving doily with a couple more hearts.   This was definitely a hit! 

Gina's Designs Products

Friday, February 14, 2014

Love Wall Art

Hello-  Here is a little wall art from Gina's Designs.  The actual kit comes with the chipboard square that I covered with Valentine papers, the corrugated board  and then the letters L O V E. I used the swans from the Cupid set as the hanger at the top!  
I painted the letters with a deep red paint and then left everything else natural!   Adding a few bits and pieces from the Valentine Sets that Gina has along with the ever so lovely doilies! 

Gina's Designs Products: 

Thursday, February 6, 2014

Memory Card Organizer and Tutorial

Hello Everyone!  Heidi here with a little different project for today. 

 
I have been working on some project life pages for my son and I needed to find some type of organization for my cards that I had started to collect.  So of course my first thought was to reach out to Gina for some assistance- and this is what she came up with!  Isn't it beautiful!  
 It was very easy to put together just like all of Gina's organizers and home decor, I have included some photos at the end of the post with directions.  Remember that items like this come with detailed instructions on assembling them.   But quite honestly, my favorite part of these projects is decorating.  For this one I just covered the entire organizer in newsprint to give it a vintage feeling.  Then I added some of the little photo frames with some memory words.  
As you can see- the divided sections are perfect for the different size of cards.  And then there are the dividers that come with the box and you can purchase additional dividers as needed.  

Gina's Designs Product
Memory Keeping Organizers
Postage Frames


Putting your Organizer Together
Did I tell you that it was easy to put together ?
Did I tell you that you will get detailed instructions?
Well here is a little tutorial on putting it together:
1.  Lay your parts out on the table and always start with the center piece.
2. Start sliding all the part together and once they are together add a little glue to the slots.
3. Once all the center pieces are together set them onto the bottom and slide together and glue.
4. Finally- add the 4 outside pieces, glue and then you are ready to alter!

Now go and have a good time decorating your organizer! 

Wednesday, January 29, 2014

Hugs N Kisses!!


Happy Sunday!! 

Today I have a cute little project for Gina's Designs.  It is a wall hanging kit- pretty much everything is included.  So I covered the back piece of chipboard with some cute little XOXO paper from SU.  I then painted my X's and O's with pink and white paints and then added a little texture to the tops of the pink ones.  I also used a few little gems on the whites to give it a little extra sparkle.  The pink heart border was also a part of the kit.  

Gina's Designs Product

Sunday, January 26, 2014

Simple Project Life with Gina's Designs and The Robins Nest

Are any of you participating in Project Life or at least similar type memory keeping? I am working on a project and thought that I could use some of Gina's Designs products on these little cards.  So here I have made 2- 3x4 in cards and 1- 4x6 card.  I kept these cards clean and simple but had a great time with the chipboard pieces.  These will easily slip into my protectors.  

Products:
Gina's Designs: String Alongs Hearts
The Robin's Nest: Wild About You

Saturday, January 18, 2014

Gina's Designs and The Robins Nest....

Hello everyone,today I am showing off a project in collaboration with Robin's Egg Papers.  We got some cute Valentine prints and so what could be cuter mixed with my Gina's Designs chipboard. 
Here is a photo of all the cards together. I kept all the backgrounds white and then layered the printed paper with red.  
This card uses a doily and one of the sweet little Valentine String Alongs- so darned cute!  
 This one was fun, a little block card with one of the heart pieces as a center.  
And then this final one has the most chippies on it- all misted with glimmer mist. These pieces are so easy to use on your Valentine projects, leave them natural or color them!  And you get lots of pieces!  
Don't wait though- get them now so you can work on those heart shaped goodies! 

Products:  The Robin's Nest: Wild about you paper Gina's Designs:  Valentines Shape Set  Gina's Designs: Cardstock Doily Set Intricates Gina's Designs: Border Sticks Gina's Designs: String Alongs Hearts

Friday, January 10, 2014

Luvin' my paper pad storage!

  I don't know if you are like me but I have piles of 6x6 and 8x8 paper pads in my cabinet but find if I have them out on my desk I am more inclined to use them.  I also like to bring out my season pads so that I remember what I have- and what a great way to do this with Gina's Paper Pad Holder.  
When I got this box I had to assemble it and I wanted to share a couple of photos on how easy it is to put together.  
1. I typically lay all the pieces out to see how they fit together, make sure the shinier side is on the outside and that all the slots fit- basically put it together without the glue. 
  
2. I then start the glue process, remember there are slots so I put a small amount of E6000 along the edges and then stick them together- holding them in place with some support as you will see in picture 3.
3. Once I get the outside pieces together it will look like photo 4: to get to this step I will usually put all 3 pieces together and then provide the support on each side so that in 30min the outside is together and dry enough to move on. 
4. The last step is to add the dividers, once you put all these pieces in you will want to make sure that you have the support to push it together on each side again until the glue dries (approximately 30min).  And there you are ready for the fun part! 

And there you go- time to do some fun embellishing.  You can make it quite simple as I have- or go way out with die cuts and chippies!  
Gina's Designs Product:

Saturday, December 28, 2013

Welcome Precious Little One........


 Hello Everyone!  I do hope that you had a wonderful holiday.  I was looking at this photo and thinking this does not look like Christmas, or even winter for that matter!  But it is a layout that I did for Gina's Designs a bit ago and still wanted to share it.  I don't typically do layouts as I am more focused on project life type of scrapping right now but the windows in this one just beckoned to me.  

The paper is some I had in a pile and is like ruled paper but done in pink (of course my favorite color, right?)  I thought it would be ideal for a little girl's picture or a baby picture, which I did not have either of.  I thought against putting my boys pictures in the window.  Ha ha!  
I just love the little sentiments that Gina's Designs has!

gina's designs products: