Pages

Saturday, December 28, 2013

Welcome Precious Little One........


 Hello Everyone!  I do hope that you had a wonderful holiday.  I was looking at this photo and thinking this does not look like Christmas, or even winter for that matter!  But it is a layout that I did for Gina's Designs a bit ago and still wanted to share it.  I don't typically do layouts as I am more focused on project life type of scrapping right now but the windows in this one just beckoned to me.  

The paper is some I had in a pile and is like ruled paper but done in pink (of course my favorite color, right?)  I thought it would be ideal for a little girl's picture or a baby picture, which I did not have either of.  I thought against putting my boys pictures in the window.  Ha ha!  
I just love the little sentiments that Gina's Designs has!

gina's designs products: 

Wednesday, December 25, 2013

Blessings

Merry Christmas !!  My wish to you is a blessed Christmas filled with family, friends and good memories.  

Tuesday, December 24, 2013

Merry Christmas


I had so much fun coloring these Magnolia snowman a few weeks ago.  I stamped a few of them and then set to coloring a few of them.  This one I fussy cut out and used my numbers embossing folder.  Another simple card don't you think? 

Monday, December 23, 2013

Deck the Halls!

Now this card, I love the simplicity of this card and yet it is adorable, right?  The stamp is SU with the MS jingle bell punch.  Can it get anymore simple?

Saturday, December 21, 2013

Christmas Cheer!

Hello everyone, I can't believe it has been almost a week since I posted here on the blog!  I have quite a few holiday cards to show so I will be posting some of these between now and Christmas.  Posts will be short and sweet but hopefully will give you a little inspiration !


Sunday, December 15, 2013

Home Decor...........

Hello my friends, today I wanted to share a couple photos of my home during the holidays this year.  This vignette is different this year as it is a table I moved by the front door.  The greens are from my tree in the front and boy, do I have a mess to clean every single day!  But I love the look mixed with the pointsettia garland.  See that huge red ball?  I got it last year after Christmas at Marshall's for a steal and I LOVE it!  I will light the candle in the star in the evenings.  
This picture here is the mantle in the great room.   I used to have my stockings hung but since the boys are bigger and well, I just needed a change I went to silver and green (with a splash of red) last year.  But each year I mix up the items I add to the vignetter a little bit.  

If you post photos of your home decor, please leave me a link= I always love to look at others! Better yet- link up to the Shabby Love Link Up

Friday, December 13, 2013

One last Reverse Confetti

I told you all that I was having fun with this sketch- it seems like they have some good ones that I can easily work with.  DSFYTT over on Reverse Confetti.  I can not tell you how much fun I am also having with that darned little bell punch. My mom got it for me  a couple  years ago and I never thought I would use it like I do.  Enjoy and I hope you are getting your cards done. Mine should go postal this weekend. 

Thursday, December 12, 2013

OH what fun..... we had!


This is another card I made using the DSFYTT over at Reverse Confetti.  Now I will confess that I turned it around a bit but you can still see the elements of the sketch.  I have gotten so comfortable making cards that are standing up and this orientation is one I don't use much so I wanted to add a little to the challenge.  I stuck with the same papers as well and think it is a cute little take on it.  Hope you are finding some inspiration in my cards, I might add that all of them are quick, easy and you can replicate them quite quickly. 

Wednesday, December 11, 2013

A little Paper Bag Album- Gina's Designs

Hello all my friends....  today I have a little paper bag album for the holidays that I put together this last week using a bunch of my goodies from Gina's Designs.  I used one of the holiday chippie sets and then a couple little other items.  It was alot of fun to make and now I need to decide what to do with it! 
 This is the front of the album.  This little album is 3 paper bags put together and then I glued two pages together to create a little pocket for trinkets and goodies. I inked up the edges of the bag as well - covered the sentiment with some ink so that it was not plain kraft. One of the things I love about these chippies, they take ink well and you don't have to use alot of it. 
 The inside or first page- I used a few items, of course a doily and the snowflake border and sled from the winter shape set. 
And the final little page- I have included the snowman, mitten and some snowflakes.  I then tucked a little tag into a glassine envelope. 

Gina's Designs Products  

Tuesday, December 10, 2013

Christmas CHEER


Ladies, I am moving right along. I was able to get about 12 cards done last night and another 3 tonight so far.  I thought since I was creating I would at least utilize some fun sketches (and challenges) so this is a reverse confetti SFYTT.  You will see a couple more takes on this one in the next couple days. 

challenge:  really reasonable (button, image/text, polka dot (paper))along w/ twine.   

Monday, December 9, 2013

Slow to gettin 'em done!


Are you all done with your Christmas cards? I am not, as a matter of fact I just got started this last week.  It seems that I am only able to do a couple at a time which is not getting me very far fast.  The papers on this one are from Finland, I can't recall the name at this moment but it is wonderfully thick and detailed papers. LUV them!  The little image is actually die cut from another of the series of papers!  Ha..... cute huh?  

Ok, so that is one down! 
Heidi

Also- be sure to stop over and give Gina's Designs Facebook Page a LIKE  and be entered to win a prize pack, we just want to  hit 500 and we are only 27 likes away!  Come on and check us out!

Tuesday, December 3, 2013

A little Flower Fall

Happy Fall

Today I had a few minutes to work on some crafts so I pulled out my copic markers and started coloring a bunch of snowmen for my Christmas cards  (screeeech....... typing comes to a halt.)  Ok, forget that!  What I meant to say is I pulled out these beautiful fall sunflowers and started coloring them for this "fall" themed card.  I love to volunteer for different things at church and in the community and thought this would be a beautiful card for someone ....  I have my recipient in mind so I just need to mail it out.  The sentiment is so inspiring don't you think? 

I hope you all have a wonderful week! 
Heidi

Saturday, November 30, 2013

Blustery Day!

 Hello all my friends!  I hope you all had a wonderful Thanksgiving and were able to spend some time with your family and friends.  Did you go out Black Friday Shopping? I went out this morning in hopes of getting a couple things and that is about all I got- and they were not the things that I was hoping to get.  I guess if you want the stuff you need to go on Thanksgiving and I just could not do it.  
 Today I have a coupe of cards that I made for Gina's Designs that I wanted to show to you all.  I know, they are quite blustery and cold but you know.... it has been cold here.  The papers are ones that Johanna sent to me from Finland and I think they are just the cutest!  Both of the cards use doilies and snowflakes. 
This is one of the snowflakes up close. I actually painted a few of them with white paint and then I used some glitter on them: the chipboard does well with these products and the pictures do not do it justice- they are beautiful!  

Gina's Designs Product Used
Other suggestions

Wednesday, November 27, 2013

Happy Thanksgiving my Friends


Just a cool little subway art sign that I made last month.  Hubby cut out a bunch of these boards for me to attach a variety of subway art to and this is the first one that I got made.  I had this printed in a very deep black and then I used spray adhesive to adhere it to the the board.  I wanted to be sure it sealed so hubby had some nice spray sealer and took it away to be "treated".   When he brought it back it looked like THIS!  I LOVED it..... we do not know what happened but the spray made it look very distressed. 

Sunday, November 24, 2013

Spoiled!

Hello Everyone!  It has been a very busy weekend here at our house.  I spent Saturday at our local craft show as this is one of my big events that I host each year.  I was exhausted afterwards.  Then, today it was off to the Lions game- sorry to say they lost though: but it was nice time spent with hubby.  

I am sure you remember these colors, right?  So I just had to share with you another card I made for challenge over at Reverse Confetti.  It is simple and clean don't you think?  I hope you all have a great week! 

Saturday, November 23, 2013

Stars

 Back again and guess what?  I have another card in Navy, Orange and Grey..... are you tired of it yet? I hope not as I think the cards are kind of cute.  I was thinking next months Reverse Confetti color challenge I might make the exact same cards but in the new colors?  LOL- but notice the little die of stars?  I got this from Verve and had set it aside and forgot about it, love it!  I think it will make some cute little baby cards or Christmas ones.  I picture it with a sillouhette of the wise men (don't have that one but think it would look nice).  Ok, so that is all the rambling for today- have a great weekend ladies!

Wednesday, November 20, 2013

Luvin' this color combination!!!!


Happy Wednesday! 
Back again with another Reverse Confetti card in Grey, Orange and Navy.  I will be honest with you- I think that I ended up making 5 of these cards.  I tried to make them all different and probably all masculine for the men in my life!  I am loving this combination!  

Monday, November 18, 2013

Are you CURIOUS about my Cabinet????

Happy Monday!  

This weekend I decided to set to work on my Gina's Designs Curio Cabinet. I knew when I
first saw it in the store I had to give it a try although honestly it did not turn out the way I had envisioned it. 
I initially painted it ivory, thinking I would distress it and then when it was over it looked good but so plain.  So then I chose to cover it with designer paper- Crate Paper.  Then I started painting the doors and detailed areas as the ivory didn't work with the paper.  I guess my goal was a little old fashioned cabinet sitting in a dining room somewhere.  So I thought, what else would be in that dining room?  What about a chandelier? 
I painted the chandelier with some adirondeck paints in pool and then I covered the entire thing with some glitter and added a bow.  It really does look pretty on the side.  And what else was in grandma's dining room......   a bird cage of course. 
  What do you think?  I was thrilled that I could paint all these items to match this awesome paper.  I then wanted to add a few little trinkets inside of the cabinet.  Now as you can see I have a little wreath hanging on the front (in honor of the season coming up).  But when you open the door- just a few little jars and platters. 
I used a few little glass jars on the inside along with making a few little platters or layered items to represent some little trinkets inside the cabinet.  I had a few little spools and some beaded  pins.  I just thought vintage would work best. 

I do hope you enjoyed this project and remember you can get it at Gina's Designs! 


Sunday, November 17, 2013

RC Color Challenge

Was working on my GD project this weekend and while things were drying I decided to pop over to Reverse Confetti and low and behold they had a color challenge......

Well I could not resist the temptation- I love these colors together and one thing for sure it lends itself to some masculine cards.  So today's card is one I made for this challenge.  


It is what I call a very simple card but my hubby tells me the more simple (less stuff on it) the more manly.  LOL- he was even questioning the button and twine.  No doubt- I will be making more with my left over papers this week.   I hope you are having a fun and creative weekend my friends! 

Sunday, November 10, 2013

SFYTT- Reverse Confetti

So this was the original card I had in my head when I woke this morning.....  lots of embossed layers with the sketch for the Reverse Confetti SFYTT.  Then I remembered I had the pointsettia die from SB that I got last year and wanted to try it out and embossed a couple layers of that as well.  Overall I think that it came out very pretty, although no glitter or sparkles - what was I thinking?  I might have to go back and do a little stickles or something.  

Have a great rest of your weekend! 
Heidi 


Its another WOW

Happy Sunday- today I was spending some time in my craft area and thought I would make another WOW (white on white) card. I actually woke this morning with a few little ideas in my head and so is where it was heading to.   I used the spellbinder pointsettia but didn't really want it to be that so I just dropped a single pearl into the middle vs the 3 little "balls".  LOL- yeah, I know that is not what they are called but I bet you know what I am talking about.  Have a fabulous weekend my friends. 

Challenge:  WOW  Just Rite Stamps
                 Sketch:  SFYTT

Saturday, November 9, 2013

Christmas Tags!

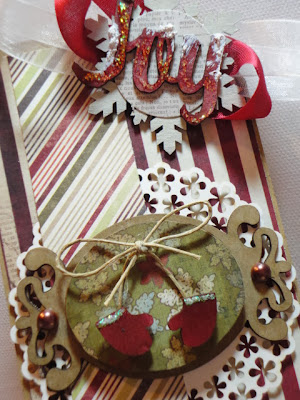
 Happy Saturday Everyone- Heidi here today with some Christmas Tags.  Usually every year I host a tag swap with about 20 other ladies as these are one of my most favorites things to make for the holiday gift giving.  It is funny how creative one can get making tags, from the size of the tag to what you embellish it with.  Right?  All 3 of these tags are made with the chipboard tags in the store which are fabulous- no cutting them out or anything- just a package of them delivered to your door!  
 At first I was not sure what I would put on the tags but loving to layer chipboard and add lots of ribbon just seemed to work best.  I love the look of this little layered sentiment label- it almost looks like a piece of wrapped candy too doesn't it?  
I also wanted to add some snowflakes to my projects so I took the chipboard pack of snowflakes and painted them all a light ivory- once I do that I can then spray them with a little color, add some sparkle and good to go!  The snow on my words is dimensional snow- and I just love this stuff.  
So now I must say I am 3 tags ahead!  I hope you all have a splendid weekend! 
Gina's Designs Products

Tuesday, November 5, 2013

"WOW!"

Hello! 

Back today with another card I made over the weekend for the JustRite Challenge of "WOW"=white on white.  I wanted to add a bit of texture to this card using the embossing plates, the glitter/embossing and the dies.  I wanted it to be elegant and glittery and think it will make a beautiful anniversary card.  

Have a fabulous week! 

Sunday, November 3, 2013

What? No ribbon or lace?

 I have been trying to play along with a few challenges over the last couple of weeks and it seems like I spend Sunday working on it and then I am too late posting them and entering them.  Tell me if that is frustrating?  Oh yeah.... so today I made sure to get these two cards posted.  Both of them are nice fall cards and focus on thanking those who give of themselves.  
I got to pull out my pumpkin spellbinders too.... yeah,!  These are the cutest little things and like so many of my other ones, I forget about them.  I love to add a little sponging to ge them a little character.  :)  

I hope you have a fabulous week my friends! 

Challenges: 
Our Daily Bread Designs: no lace/ribbon
NSFYTT: sketch

Our Daily Bread 2


This is my second card submitted for the ODBD Challenge this weekend. 

Thursday, October 31, 2013

Halloween Board Book

Hello and Happy Halloween!  
I had this fun halloween paper and wanted to make a board book using my Gina's Designs spooky halloween chipboards!  
This is the front of the book.  Here I used the lampost, bat and BOO! from the chipboard kits.  I painted them all black and although you can not tell from the photos they are raised to give the book a 3D effect.  
Here is the first set of pages- the little pieces at the top left are chipboard pieces, painted black along with the banner in the lower right corner.  It is part of the which has lots of banners and flags. 
 Next set of pages with a few little embellishments.  The Spooky in the top right is so fun!  Can you tell I had lots of black paint?  LOL- no it just made sense to paint them all black to coordinate with the paper pack.  I added some black pearls to give it a little dimension as well. Oh and look at that spooky cat! 
 The final set of pages has a pumpkin and spider web, at least I didn't paint the pumpkin black, right?  
You can find all the chipboard goodies over at Gina's Designs.   


Thursday, October 24, 2013

Friendship Blooms JustRite


Today's card is one I made for the JustRite challenge.  It is a sketch challenge that is kind of like color blocking which I always feel lends itself to simplicity and cleanliness.  I got this pretty little fall paper and thought it would be nice for a fall friendship card.  The stamp set is Just Rite- added a few little pearls and good to go.  Vintage and Fall!  

Sunday, October 20, 2013

Vintage Halloween


Happy Spooky Halloween

So this weekend I got to pull out my copics and do a little coloring.  I wanted to make a vintage kind of Halloween card (finishing up my halloween cards).  I actually tried the no black outline technique by stamping and embossing the image and then coloring it.  Of course vintage would not be complete without a little distressing and inking.    Of course, I had to pull out my cheery lynn dies:  fence, lampost and the little web corner pieces that if you put them all together you get a full web.  Come join us on the CL challenge!

Wednesday, October 16, 2013

First Subway Art


One of my favorite things right now is Subway Art..... so I did a little research this last weekend so I could start creating my own.  And this is my first piece!  No, maybe not the most magnificent work of art but a nice start (I think!).  

Saturday, October 12, 2013

Spooky Witchy Halloween~!

 Happy Spooky Halloween 

Back today with a few more little Halloween Cards!  Still having fun with these things I tell you.  Not sure if it is the colors or the images.  This top card is just a fun little sketch with a few little die cuts.  The sentiment is a few different little stamps put together, kind of like a subway sort of art.  Thought it worked well like this.  

This one here uses a Gina's Designs chippie- the witch of course which I painted black.  The DSP is one from my stash of Martha's and I finally finished the pack up.  I like the papers but if you are at all like me after a couple cards I am looking for something new!  LOL.

These cards were also made for the WCMD over at Cropstop!

Tuesday, October 8, 2013

You Inspire Me..............

Hello everyone,  I have a fun and easy project for you today from Gina's Designs.  I have never made one of these in all the time I have been crafting since I always struggled on knowing how to hang them (let alone where).  But when Gina asked me for a word I knew it had to be the word INSPIRE since I knew I was gonna need a lot of it to make this.  So this is how my "kit" came. 
Ok, so the doilies (which remember are my favorite embellishments!) didn't come with the set but I knew immediately that I was going to have to use them on that bare cardstock.  I wanted this project to stay as natural as possible but you know me, I had to add a little "vintage" and sparkle to it as well!   So I set to painting the banners with a little texture.  If you see in the picture just under the word inspire are the printed rosettes (so EASY to put together too- Gina has them all scored and ready to go!). 
Here is the letter S-  so to tell you how I did each of the little flags: I painted them with a little white paint and just added a little stickles.  The next layer is the beautiful doily, the rosettes, then a couple double bows in aqua satin and sheer white tied with twine which I left hanging.  The letters were painted with a pool adirondeck paint and then I added a little white flocking and some stickles around the edges.  I think that they look so vintage/romantic.  
So here is the banner.  I tried to hang it somewhere where you could see it well enough to photograph it. It won't stay here because I would not be able to get into my cabinet but I am thinking my walls are a nice chocolate shake brown and this will be beautiful on the wall (once I wrangle hubby into hanging it properly).  
 Another close up of the flags- here you can see the layers a bit more, nice and thick! Stop on over to Gina's to get your own banner!  
Gina's Designs Products: 
Be Inspired! 
Heidi